Perspective Guide has been one of our most popular features since its introduction in Procreate 3. In Procreate 4.1 we've expanded this functionality to include three powerful new modes, all of which can be found as part of Drawing Guides.
This article will help you learn how to get the most out of Drawing Guides and offer a refresher on Perspective Guide for any Procreate veterans.
1. Enable Drawing Guides.
To enable a Drawing Guide, head to your Actions menu. Under the Canvas tab, you’ll find options to toggle and edit your Drawing Guide for that artwork.
If you haven’t previously used a Drawing Guide on this canvas, you’ll first need to enable Drawing Guides using the toggle, then hit Edit Drawing Guide.
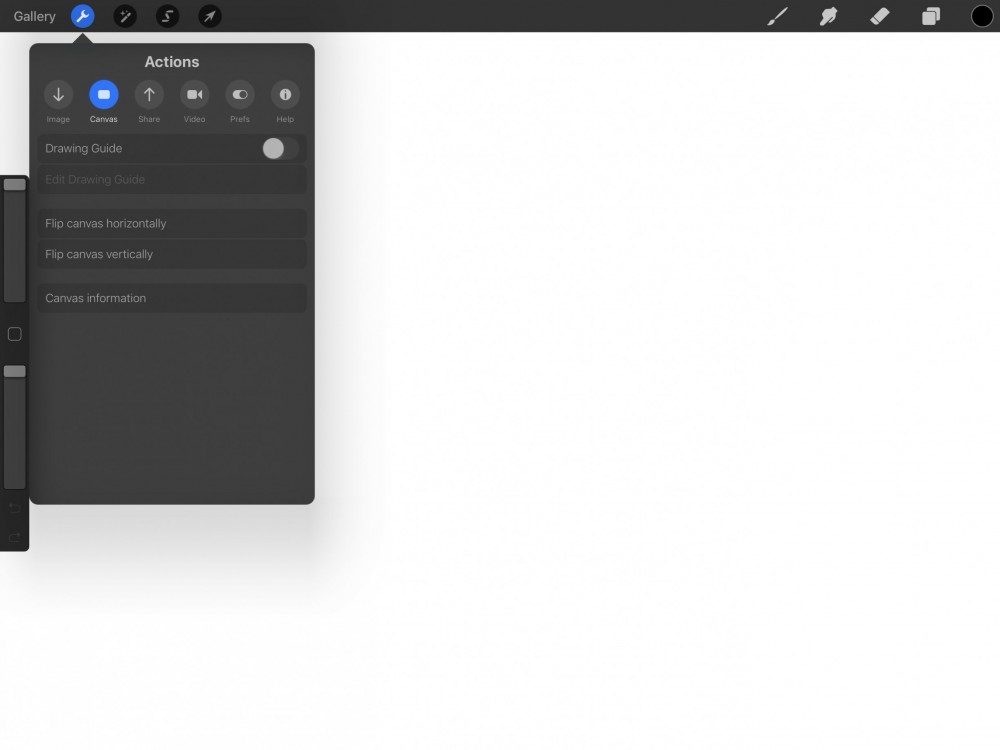
Enable and edit Drawing Guides under Actions > Canvas.
2. Choose your Drawing Guide.
Procreate's Drawing Guides now include four different modes: 2D Grid, Isometric, Perspective, and Symmetry. Tapping the buttons in the top toolbar will allow you to switch between the different guides, while the bottom toolbar allows you to customise your guidelines.
Choose a mode and default guidelines will automatically appear in place, ready for customisation. If you choose Perspective mode, just tap to create up to three vanishing points.
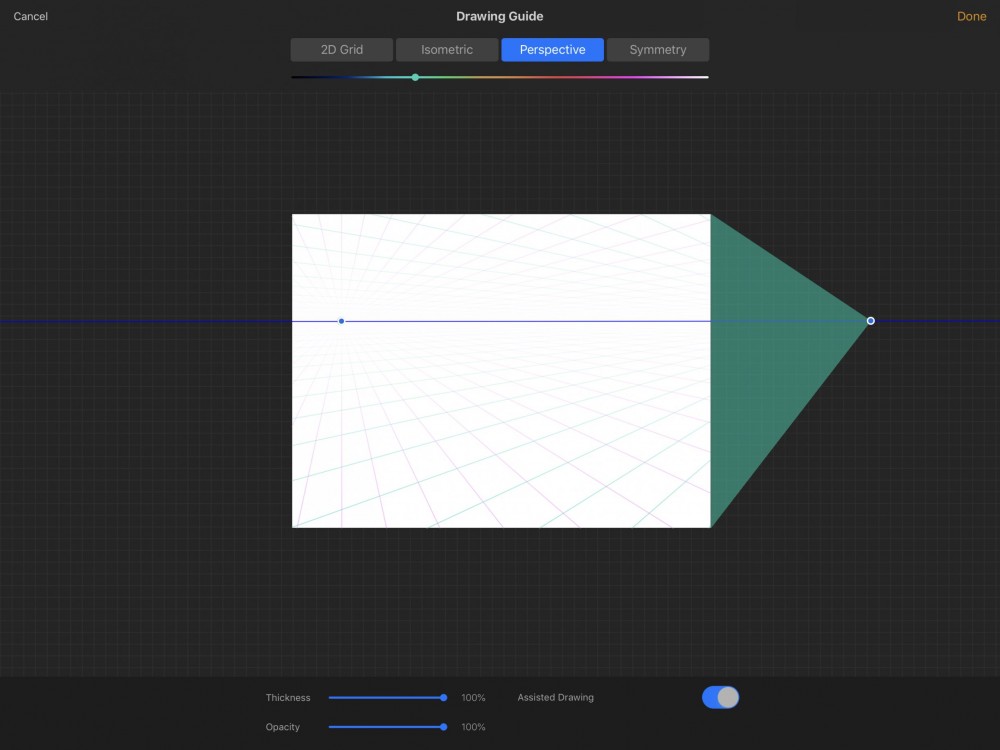
When using the Perspective Guide, you can create one, two, or three vanishing points by tapping.
3. Change your Grid Size.
The real power of 2D Grid and Isometric Drawing Guides lies in the ability to create the perfect-sized grid for your artwork.
Adjust the spacing of guidelines using the Grid Size slider, or tap the measurement readout to input an exact value in pixels, inches, centimetres, or millimetres. Use these settings in conjunction with custom canvas creation to create pixel-perfect designs for printing.
4. Customising your guidelines.
- Use the Thickness or Opacity sliders on the bottom toolbar and the Hue slider on the top toolbar to change the appearance of your guidelines.
- Change the position of your guidelines using the blue node, or rotate them with the green node.
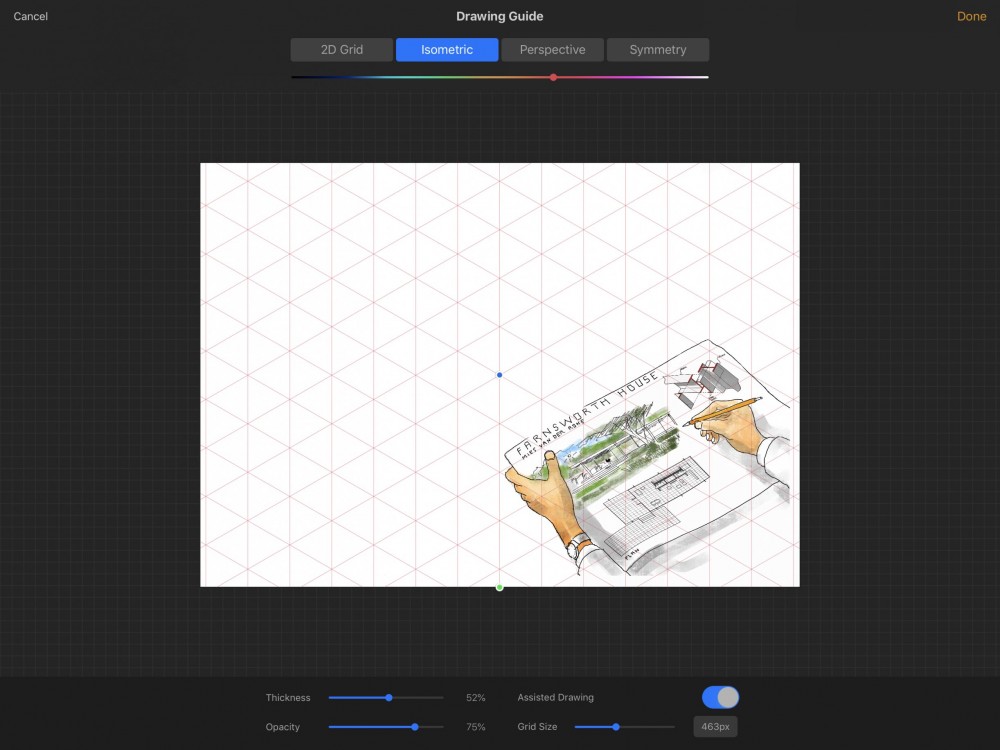
New options allow you to customise the appearance of your guidelines!
5. Drawing Assist.
Each Guide has an Assisted Drawing toggle on the lower toolbar. Toggling this setting on will activate Drawing Assist on your currently selected layer, indicated by the Assisted tag within your Layers menu.
Drawing Assist forces any paint strokes you make to follow your guidelines, allowing you to create stunning perspective artworks easily. If you prefer to draw outside the lines, toggle this option off.
If you want even more control over Drawing Assist, check out Gesture Controls in your Actions > Prefs menu!
6. Start drawing!
Once you’re happy with how your Guide looks, hit Done in the upper right to return to your canvas. Your guidelines will appear as an overlay, so they won't affect the content of your layers, or appear in your Time-lapse Replay. Remember that you can return to your Drawing Guides menu at any time to adjust your guide, or create a new one.
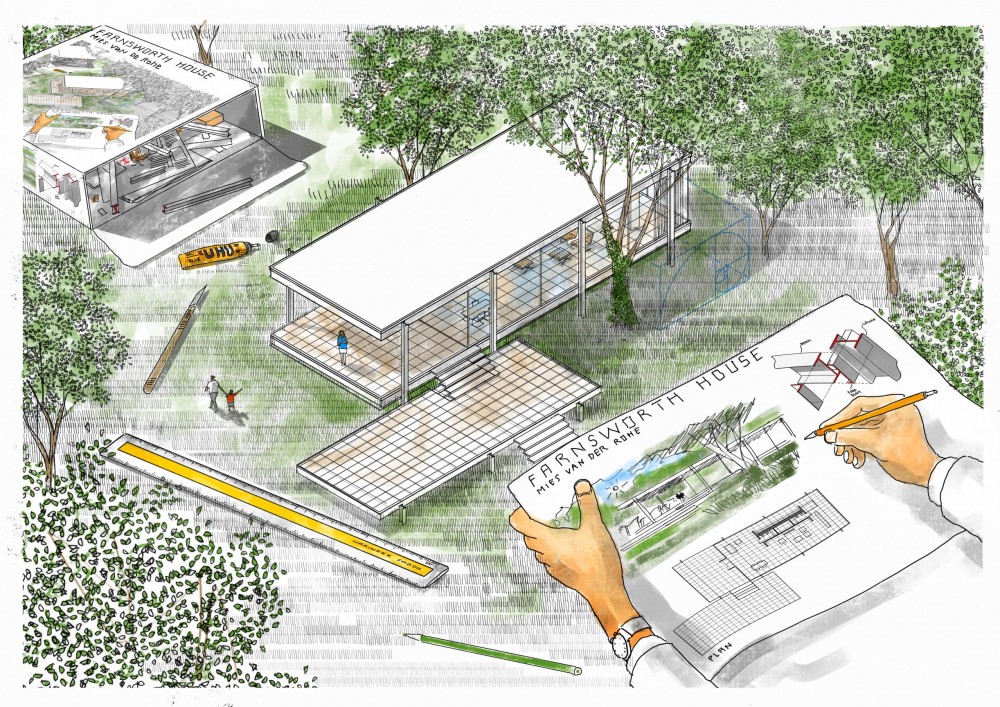
Farnsworth House, drawn by Narinder Sagoo in Procreate 4.1.
We’d love to see any artwork you create using Drawing Guides, so make sure you’re tagging #procreate on social media, or uploading directly to Procreate Portfolio. For more detail on any of Procreate's tools and features, make sure you download the free Handbook from our Support page.